
Part one: Getting started with asp.net core MVC
This is part one of the tutorial series Zero to Hero in Microservices with dotnet core.
Today, we will create a basic ASP.NET Core MVC web application. But before that lets create a github repository for our project
Create & Clone GitHub repository
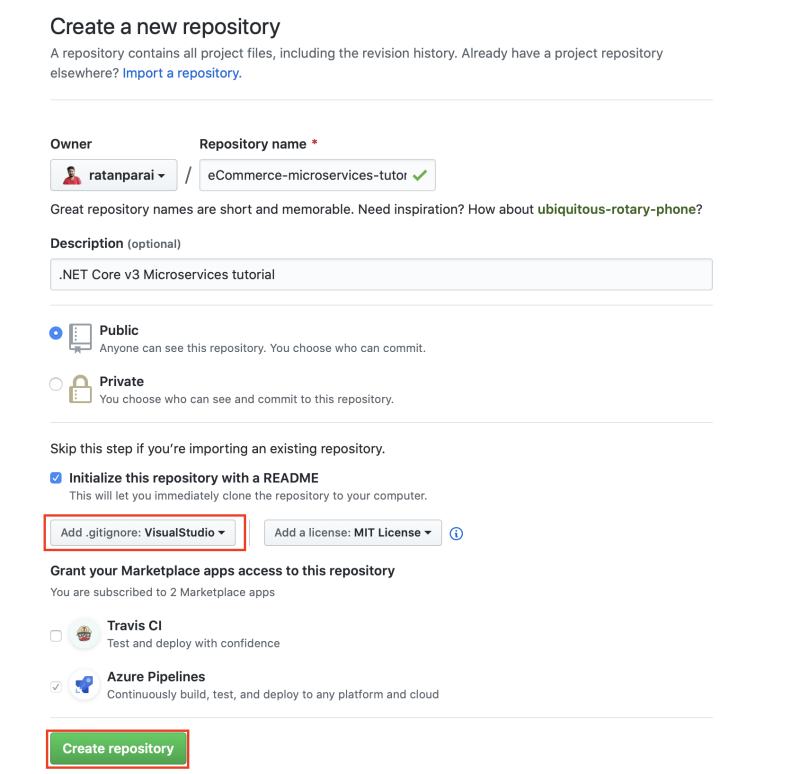
At first lets create a GitHub repository. To create a GitHub repository you can use the new .new domain repo.new. Don’t forget to select Visual Studio .gitignore, because we don’t want to commit Visual Studio generated build artifacts and user specific configurations into git.
Then clone the repository into your local machine. Copy the repository remote URL -
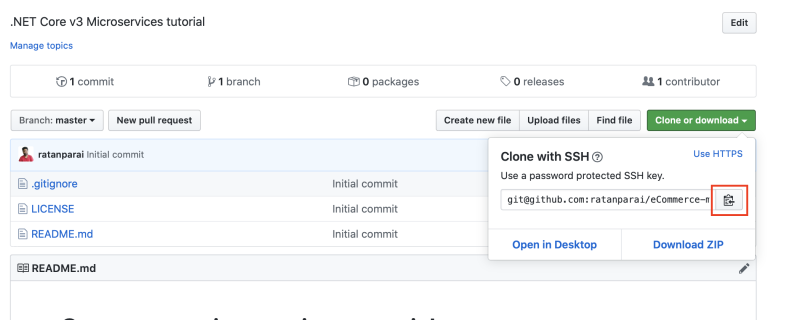
and then run the command -
git clone <your repository URL>
For my repository, the command is -
git clone git@github.com:ratanparai/eCommerce-microservices-tutorial.git
Setup initial project structure
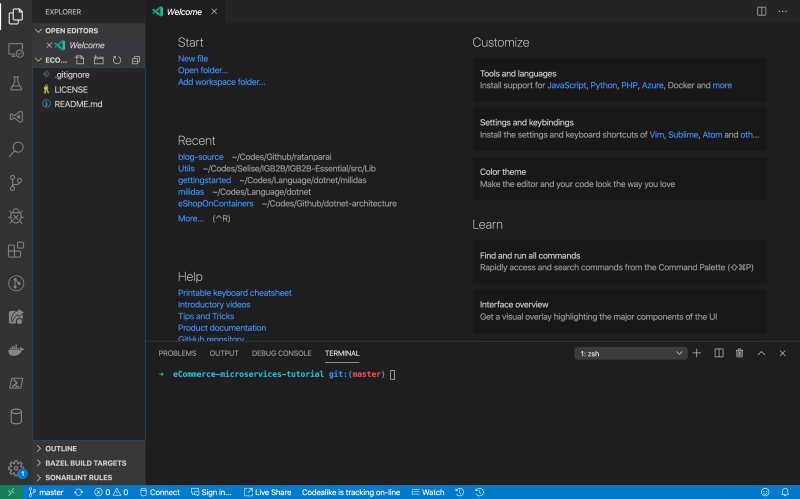
Open the locally cloned repository folder in VSCode and open the VSCode (Check VSCode Integrated Terminal for more info) terminal window. The rest of today’s tutorial we will use the VSCode terminal and dotnet command line to tool to setup the initial structure and projects.
You should see similar to this window-
Create global.json file
Global.json file is used to select the correct .NET Core SDK version to build and run .NET Core application if you have multiple SDK version. You can see the list of installed SKDs in your machine by running -
dotnet --list-sdks
To work on .NET Core v 3.1, lets create a global.json file by running -
dotnet new globaljson --sdk-version 3.1.100
This also throw error if anyone try to build the code but do not have the specified version of SKD installed. It ensure the use of right SDK version.
Create solution file
A solution is a structure for organizing projects in Visual Studio. Solution file itself doesn’t do anything special. Although, you can build, run and deploy .NET Core application without the solution file, but having one make your projects much organized and easy to maintain. We will only have one project at the beginning of this tutorial series, we will create and add more projects to the solution as we progress.
dotnet new sln
Create Project
Create folder for the project. This command will create three folders with the structure src>Web>WebMVC -
mkdir -p src/Web/WebMVC
Now create the mvc project -
dotnet new mvc --no-https -o src/Web/WebMVC
Here, --no-https tell the dotnet cli to generate scaffolding code without the https support so our web application will only be served in http. This will make our life easier to create and run our application from Docker container later. And the -o src/Web/WebMVC argument set the output directory to src>Web>WebMVC.
Now lets add the project to the solution -
dotnet sln add src/Web/WebMVC
Run the MVC Application
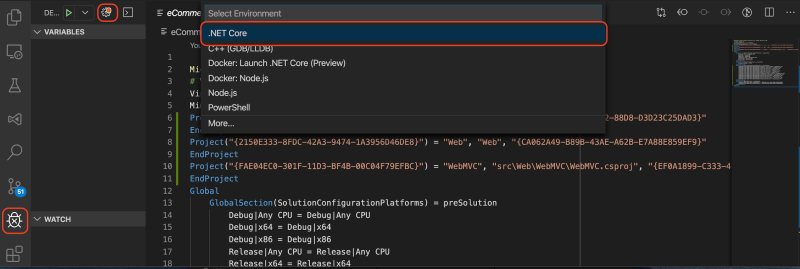
To configure VSCode to run the application, go to debug tab and click the setting icon marked in the screenshot bellow, then select .NET Core. Now you can run the application in debug mode by clicking the run button on pressing F5 in your keyboard.
After running application, you should see a webpage with the content similar to this -
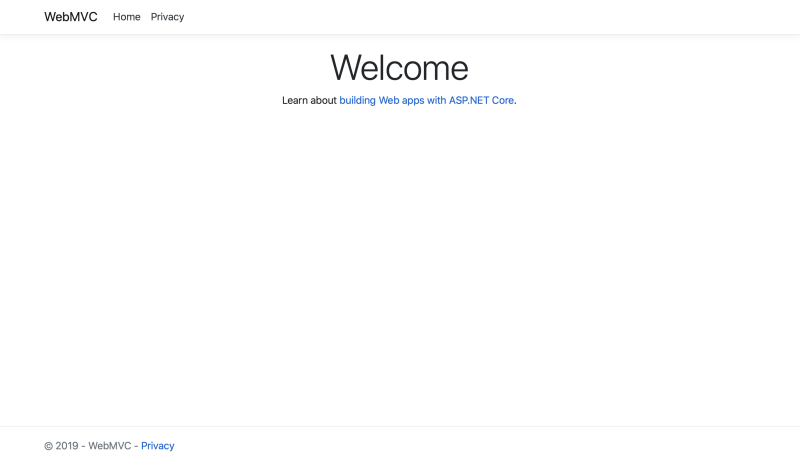
Congratulation, you have successfully created a .NET Core MVC web application. If you want to use Visual Studio, you can open the solution file (*.sln. For this tutorial eCommerce-microservices-tutorial.sln file) in Visual Studio and do the rest of the tutorial in Visual Studio too.
MVC CRUD Web Application
In this part, we will create a MVC application that can create, read, update and delete data into database. For database, we are going to use SQLite. SQLite is a file based lightweight database which doesn’t requires any special tools to be installed on your machine.
Create Domain Models
A domain model is a conceptual model of the domain that incorporates both behavior and data
Inside the Models folder create a new class named CatalogItem and add some Auto-Implemented Properties. We will improve this domain model in future tutorials, but for now, lets keep it simple -
public class CatalogItem
{
    public int Id { get; set; }
    public string Name { get; set; }
    public string Description { get; set; }
    public decimal Price { get; set; }
    public int AvailableStock { get; set; }
}
EF Core with SQLite
EF Core is a powerful ORM. Using ORM we can skip the database specific query and change our database provider from SQLite to Microsoft SQL Server with almost no changes in our code. To know more about EF Core please check Entity Framework Core
.
Install EF Core by cd into the src/Web/WebMVC directory and running -
dotnet add package Microsoft.EntityFrameworkCore.Sqlite
Now create a folder named Infrastructure and inside the folder create a Class named CatalogContext with the code -
using Microsoft.EntityFrameworkCore;
using WebMVC.Models;

namespace WebMVC.Infrastructure
{
    public class CatalogContext
        : DbContext
    {
        public CatalogContext(DbContextOptions<CatalogContext> options) : base(options)
        {
        }

        public DbSet<CatalogItem> CatalogItems { get; set; }
    }
}
Our DbContext class need to extend the DbContext class and in constructor parameter need to pass the instance of DbContextOptions<{Our_Class_Name}> to the base class.
Now we need to inject our CatalogContext class in startup.cs file -
...

public void ConfigureServices(IServiceCollection services)
{
    services.AddDbContext<CatalogContext>(options =>
    {
        options.UseSqlite("Data Source=catalog.db");
    });

    services.AddControllersWithViews();
}

...
We also need to add the catalog.db file to .gitignore as this file will hold our database and we do not need to commit this file. Please add those two line in your .gitignore file as bellow -
# Ignoring all user generated DB files
*.db
The first line is a comment, so that we understand what we are trying to do here and the second line is telling git to ignore any file with the file extension .db.
Please Note: To know how dependency injection works in ASP.NET Core please read Dependency injection in ASP.NET Core
Scaffolding Controller with Views
The term Scaffolding is used by many software technologies to mean “quickly generating a basic outline of your software that you can then edit and customize”.
Now lets scaffold a CRUD controller with view. To add scaffolding support we need to install -
dotnet add package Microsoft.VisualStudio.Web.CodeGeneration.Design
dotnet add package Microsoft.EntityFrameworkCore.SqlServer
dotnet add package Microsoft.EntityFrameworkCore.Design
Please make sure the global scaffolding tool is installed -
dotnet tool install --global dotnet-aspnet-codegenerator
Please Note: If you have already installed any of the global tools before, please run dotnet tool update --global <package-name> instead of dotnet tool install --global <package-name> to ensure you global tools is up-to-date.
and then run -
dotnet aspnet-codegenerator controller -name CatalogController -m CatalogItem -dc CatalogContext --relativeFolderPath Controllers --useDefaultLayout --referenceScriptLibraries
Here, in -name argument we need to pass the Controller name we want to generate, in -m pass the previously created Model class name and in -dc argument pass the name of our DBContext class name.
Database Migrations
To run migration, please make sure you have the dotnet-ef global tool installed. If now then install it by running -
dotnet tool install --global dotnet-ef
Now create and apply migration -
dotnet ef migrations add InitialCreate
dotnet ef database update
Update Navigation bar
And then add the new Controller in Navigation bar. To do this, please modfity the Views>Shared>_Layout.cshtml file and add another nav-item like -
<div class="navbar-collapse collapse d-sm-inline-flex flex-sm-row-reverse">
    <ul class="navbar-nav flex-grow-1">
        <li class="nav-item">
            <a class="nav-link text-dark" asp-area="" asp-controller="Home" asp-action="Index">Home</a>
        </li>
        <li class="nav-item">
            <a class="nav-link text-dark" asp-area="" asp-controller="Catalog" asp-action="Index">Catalog</a>
        </li>
        <li class="nav-item">
            <a class="nav-link text-dark" asp-area="" asp-controller="Home" asp-action="Privacy">Privacy</a>
        </li>
    </ul>
</div>
Conclusion
Now run the application by pressing F5 on VSCode or running the command dotnet run from terminal. Then go the Catalog page by clicking Catalog navbar and test our new Catalog CRUD. In this page, you can create, read, update and delete catalog items! Explore them!
Congratulation, you have successfully created a ASP.NET Core MVC Web Application. The source code for today’s tutorial can be found in GitHub - eCommerce-microservices-tutorial: part-1
Leave a Comment